Creating Reservations and Acceptance Settings
Staff can register reservations made by phone, walk-in, or the web from the reservation management screen. Before accepting reservations, prepare your acceptance rules and available slots in advance so it is easy to choose an open slot when creating a reservation.
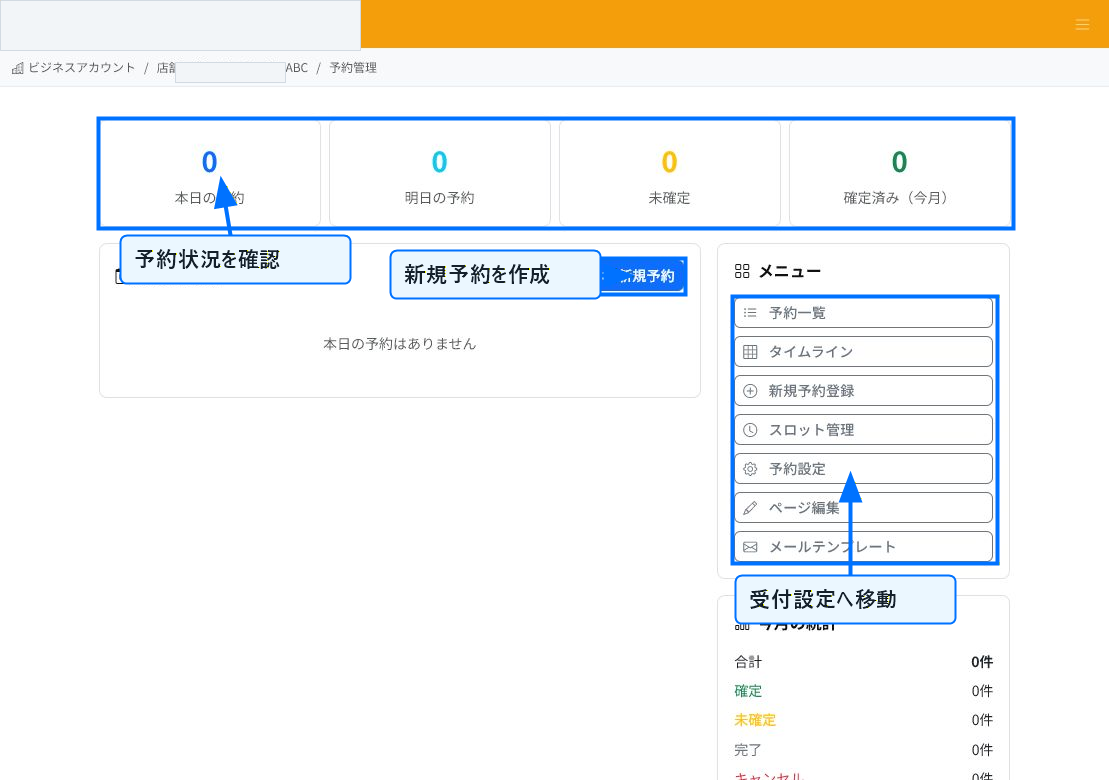
Start Work From Reservation Management
On the store's reservation management screen, you can check counts for today, tomorrow, unconfirmed, and confirmed reservations.
From the menu on the right, you can navigate to the reservation list, timeline, new reservation registration, slot management, reservation settings, page editing, and email templates. Check your initial settings and acceptance conditions before registering a new reservation.
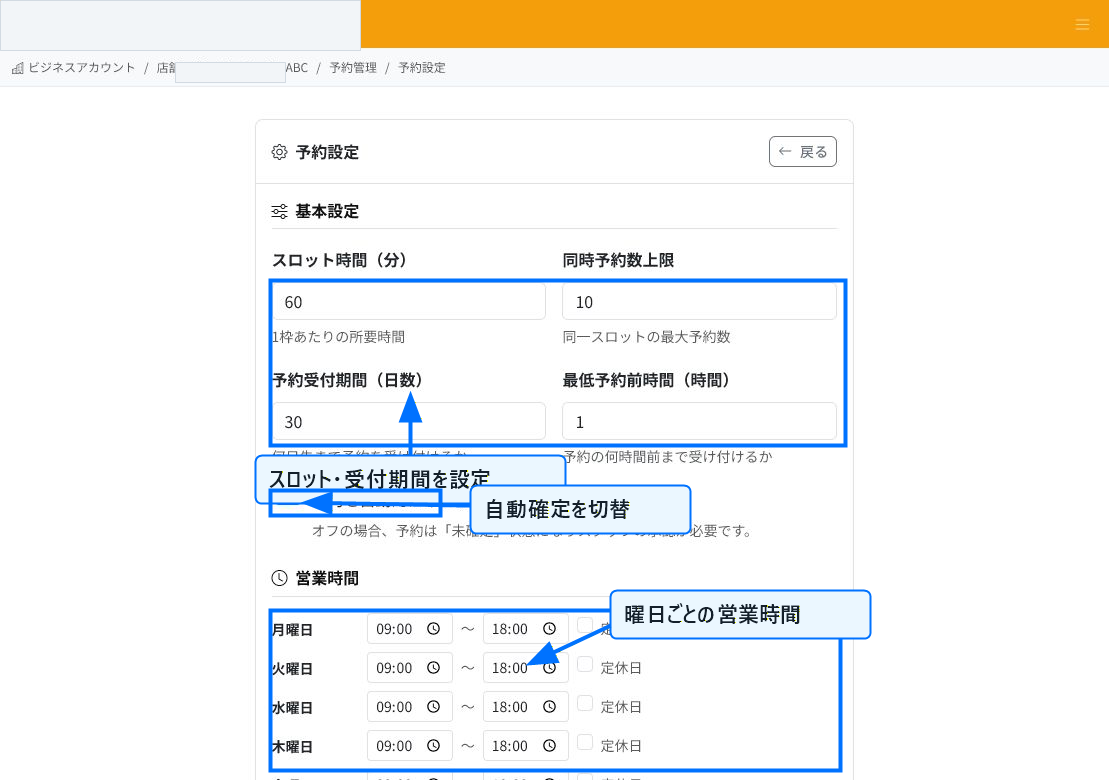
Configure Acceptance Rules
In reservation settings, you can configure the slot duration, maximum simultaneous reservations, reservation acceptance period, and minimum lead time before a reservation. Adjust the duration per slot and the number of simultaneous acceptances to match your store's operations.
Enabling "Automatically confirm reservations" confirms a reservation at the time it's registered. If disabled, it is accepted as unconfirmed, requiring staff approval afterward.
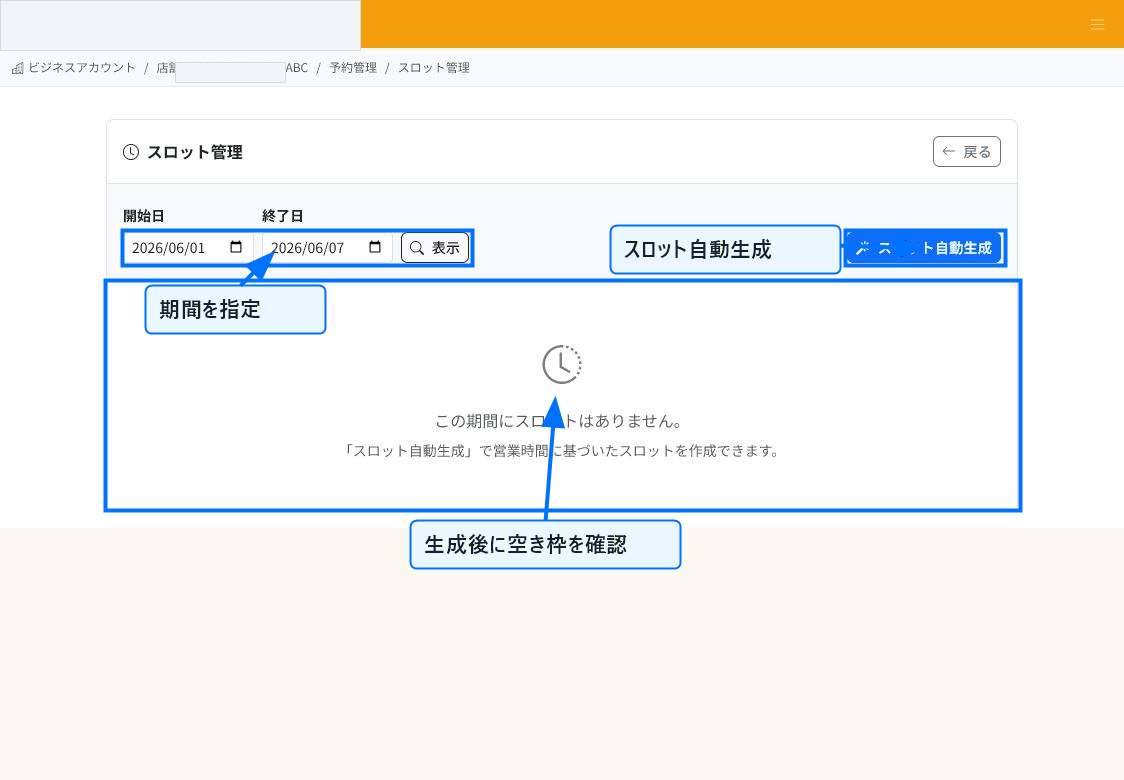
Prepare Available Slots
To accept reservations, you need available slots for the target period. On the slot management screen, specify a start and end date and select "Auto-Generate Slots" to create available slots based on your business hours and reservation settings.
On days with no slots, no availability is shown on the new reservation screen. Please check the target period in slot management before accepting reservations.
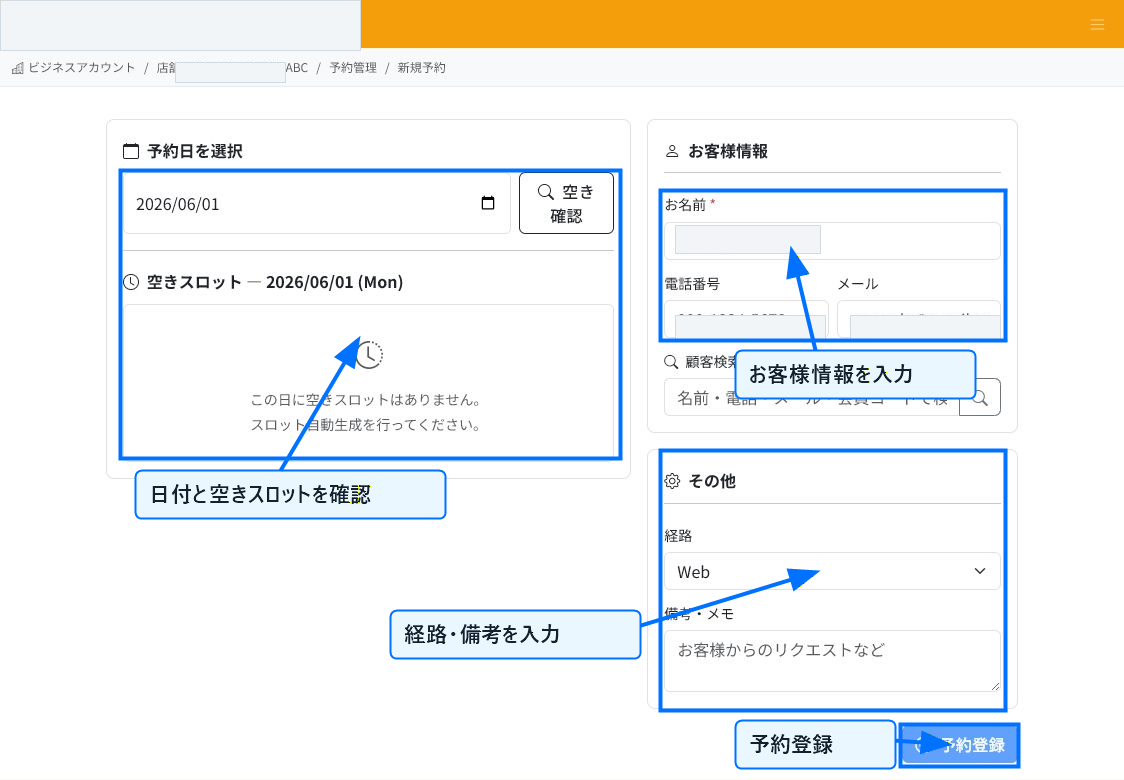
Register a New Reservation
After preparing available slots, select the reservation date on the new reservation screen and check the open slots. After selecting a slot, enter the customer's name, phone number, and email address.
Enter the reservation channel and any notes, then select "Register Reservation" to create the reservation. If auto-confirmation is enabled, it is confirmed at the same time it's registered; if disabled, it becomes a status that requires staff confirmation.
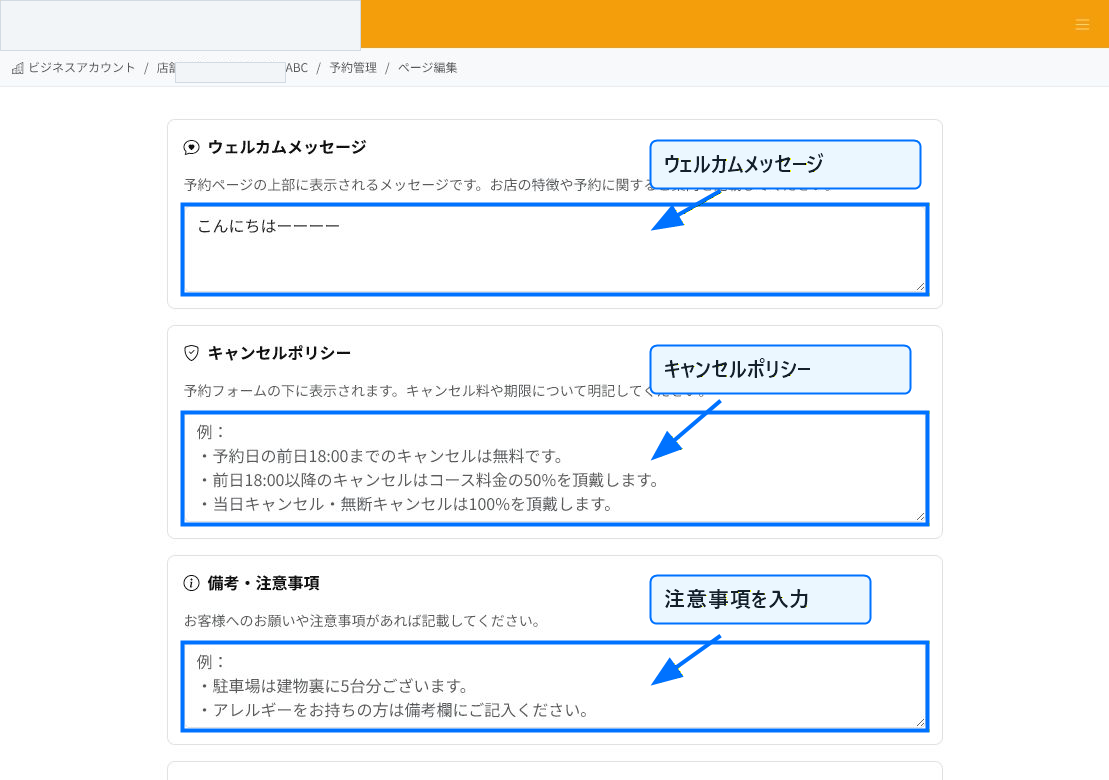
Prepare the Reservation Page Content
In page editing, you can set the welcome message, cancellation policy, and notes shown on the customer-facing reservation page.
Recording the cancellation deadline, things to know before visiting, items to bring, allergy checks, and other content you want customers to know before booking reduces inquiries and issues.
Points to Check Before Going Live
Before you start accepting reservations, check your business hours, closed days, slot duration, maximum simultaneous reservations, and auto-confirmation settings. After changing settings, re-check available slots for the target period.
Before publishing the customer-facing reservation page, check the displayed content in preview, and review whether the cancellation policy and notes are up to date.
Related Articles
Reservation Management Dashboard / Publishing the Reservation Page
-
Checking the Reservation CalendarExplains, with annotated screenshots, how to check reservation status using the dashboard, timeline, and reservation list, including date navigation, availability legend, and filtered search.
-
What Is Reservation ManagementAn overview of ReceiptRoller's reservation management feature. Explains the basics of how staff register bookings, view the timeline, and send automatic notifications.
-
Reservation Notifications and Customer RemindersExplains, with annotated screenshots, how to configure reservation confirmation emails, pre-visit reminders, cancellation notifications, email templates, placeholders, and preview.
-
Reservation Cancellations and ChangesExplains, with annotated screenshots, how to cancel, complete, or mark reservations as no-show cancellations, and how to handle date/time changes.
-
Analyzing Reservation DataExplains, with annotated screenshots, how to read the reservation dashboard statistics, narrow down the reservation list, and check cancellations and no-show cancellations.