Editing the Booking Page
You can edit the text shown on your customer-facing booking page. Writing down what customers should know before they book helps reduce enquiries and problems on the day.
How to edit
- In Reservations, open "Setup" and choose "Edit booking page".
- Enter your welcome message, cancellation policy, and notes.
- Choose "Save".
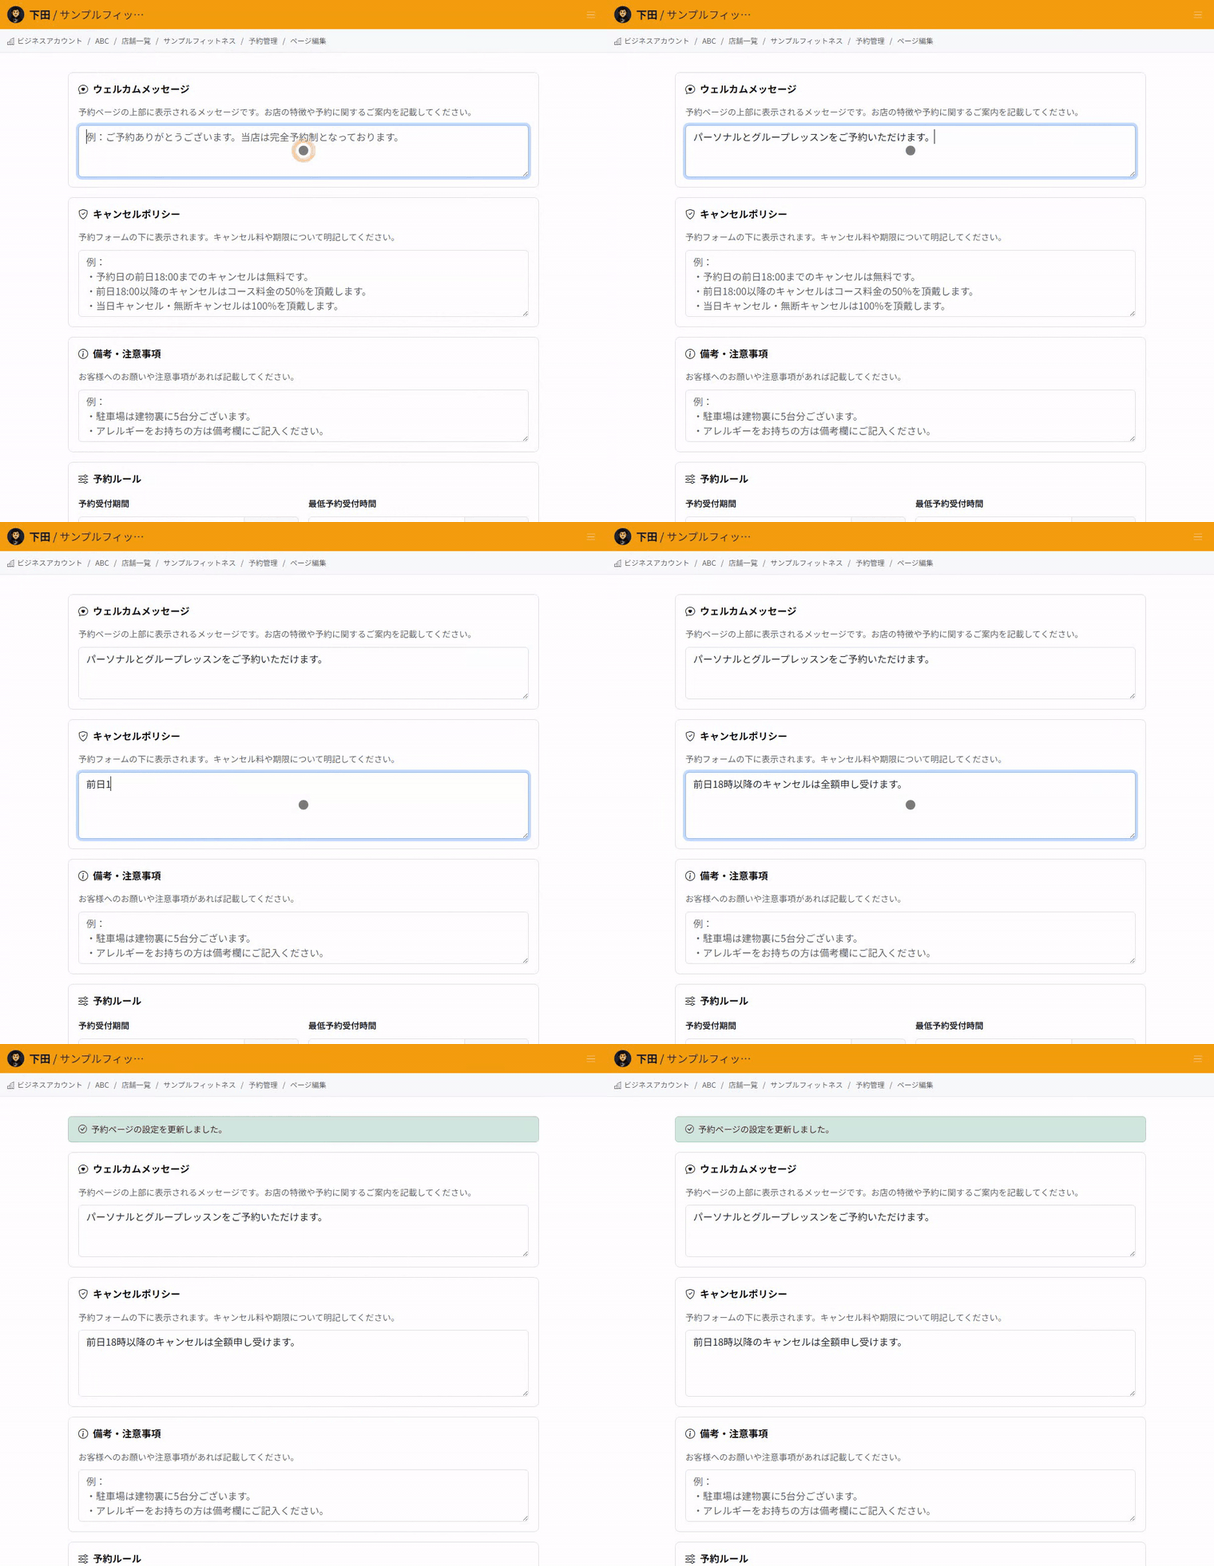
Where each one appears
- Welcome message: Shown at the top of the booking page. Introduce your store and anything customers should know first, before they book.
- Cancellation policy: Shown both on the booking screen and in the confirmation message.
- Notes: Shown on the booking screen.
The cancellation policy is also included in the confirmation message so customers can read it again after they have booked.
What customers see
Your changes appear on the public booking page. Customers choose a staff member and a menu, pick a date and time, and continue to book.
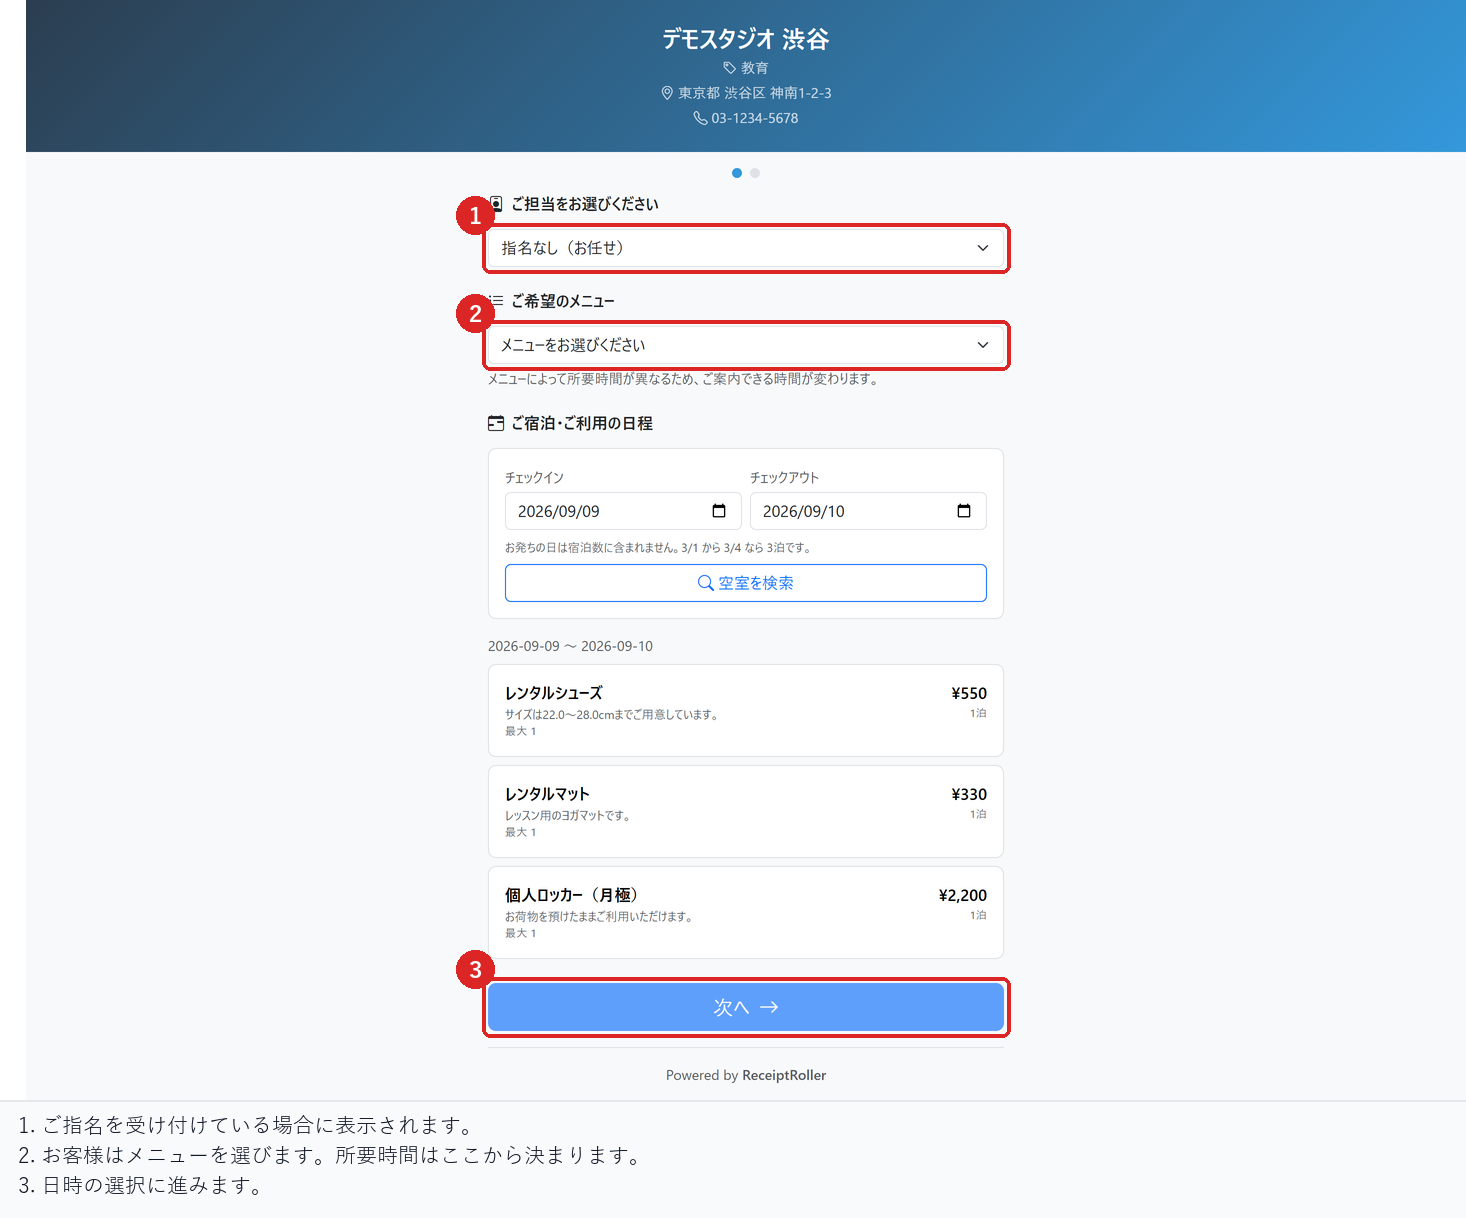
Things worth writing down to reduce enquiries
- How late cancellations are accepted, and who to contact if you are running late
- Things to know when visiting: parking, where the entrance is, how to check in, and so on
- What to bring
- How to tell you about allergies or special requests
- Whether children or pets are welcome
Booking window settings are shown on the same screen
The screen also shows how many days ahead you accept bookings and how many hours' notice you need for last-minute bookings. To change these, use the "Hours & slots" tab in Reservation settings.
Before you publish
Open the customer-facing booking page and check how it looks. Also check that your cancellation policy and notes are still up to date.
The booking page URL is shown on the Reservations top page. Copy it and share it from your store's website or social media.
Checks before you start
Enter all three texts and check where each one appears on the public booking page.
Make a test booking and check that the confirmation message includes your cancellation policy.
Related articles
Editing Email Templates / Creating Reservations and Acceptance Settings / Staff Nomination Settings
-
Booking Menus and Service DurationsHow to set a duration for each booking menu item so customers are only offered times when that much time is free in a row. Covers buffer time, choosing which staff can take an item, visibility (Public, Link only, Members only) and who counts as a member.
-
Charging No-Show FeesHow to charge a cancellation fee to customers who do not show up. Covers the card-on-file setting, when the charge is made, and why a charge may not go through.
-
Staff Nomination SettingsHow to let customers choose a staff member before they book. Covers adding a nomination fee, what customers see on the booking page, and why staff must be registered first.
-
Setting Up Deposits and PrepaymentHow to take a deposit or full prepayment at the time of booking. Covers the four payment options, the Stripe connection you need first, what customers see, and what to check before you go live.
-
Refunds on CancellationHow payments taken in advance are refunded when a booking is cancelled. Covers the difference between customer and store cancellations and what to do after the cancellation deadline.