Editing Email Templates
You can rewrite the messages sent to your customers in your store's own words. The default wording works as it is, but a message that sounds like your store leaves a different impression.
How to edit
- In Reservations, open "Setup" and choose "Email templates".
- Choose the type you want to edit.
- Enter the subject and body.
- Choose "Save".
Any type you have not saved uses the default wording. You do not need to rewrite all of them.
Placeholders
You can insert details such as the customer's name and the booking date and time into the body. The screen shows a list of the placeholders you can use; pick from that list.
Placeholders are inserted wrapped in double curly braces, and are replaced with the real values for each booking. If you type or edit them by hand they may stop being replaced, so always pick them from the list.
Check with the preview
You can view the message you are editing with sample values filled in. Check that the placeholders are replaced correctly and that the line breaks fall where you intended.
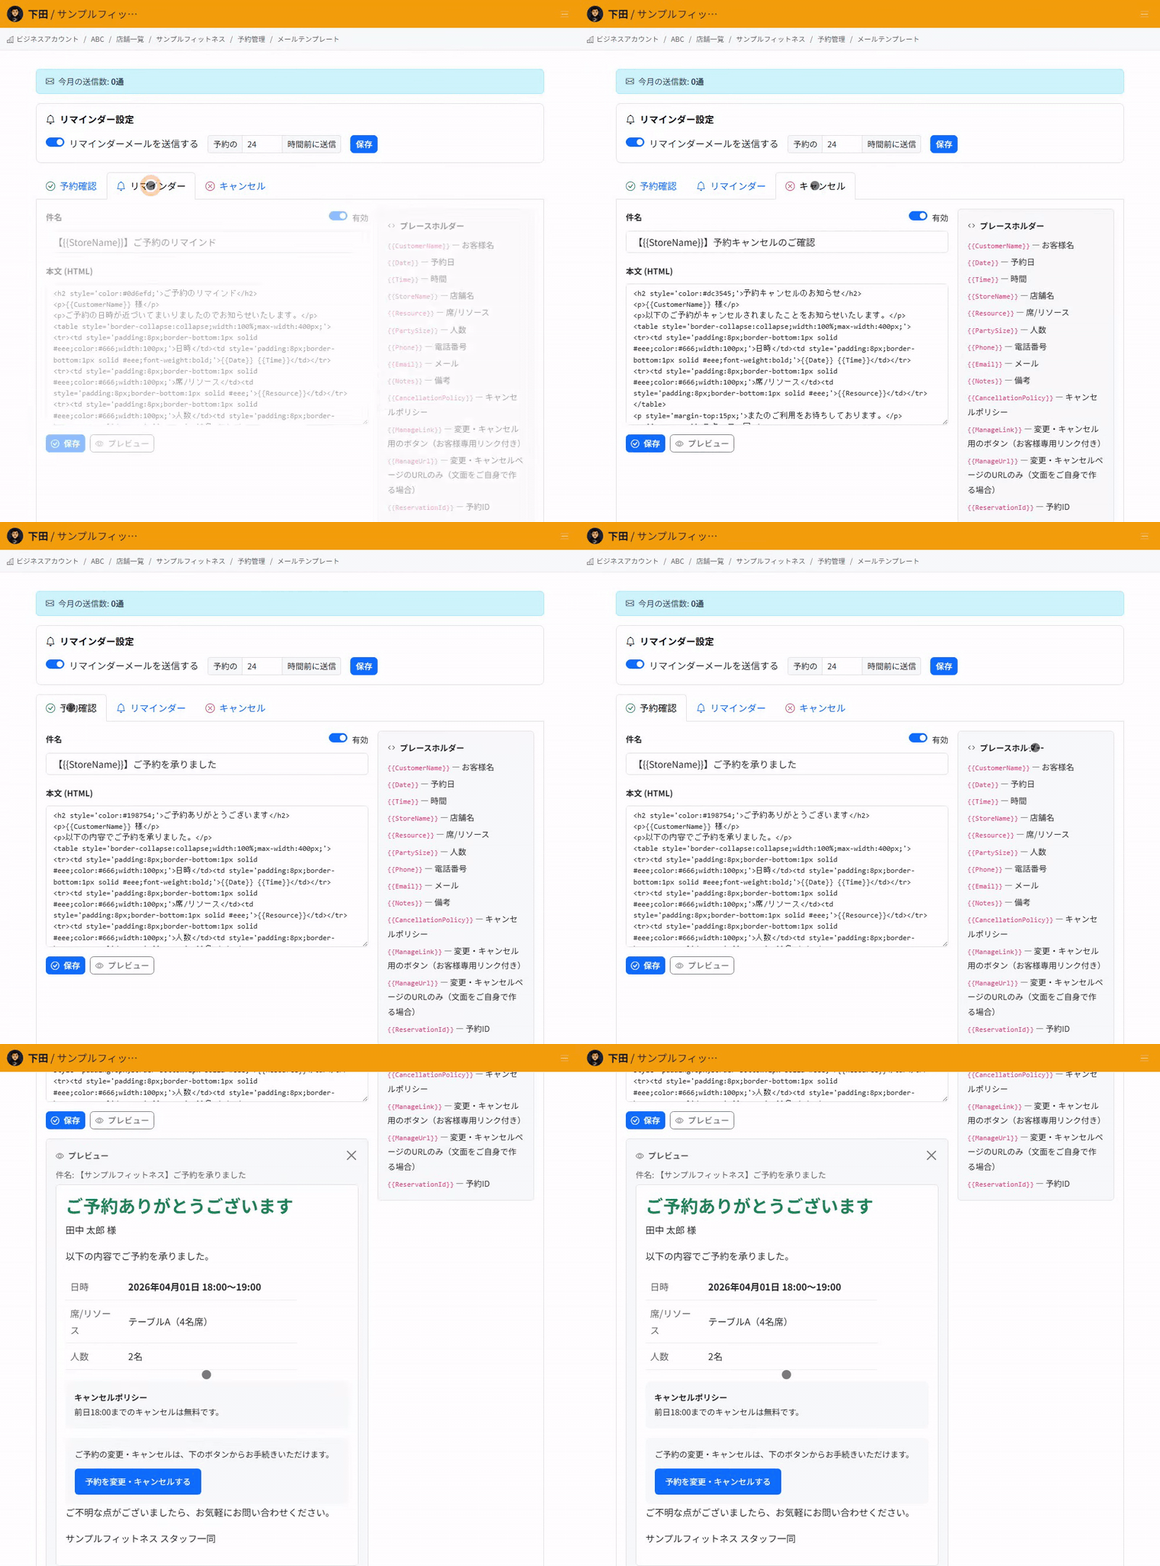
The customer name and dates shown in the preview are samples, not details from a real booking.
LINE uses the same wording
Messages sent over LINE use the wording you edit here, exactly as it is. You do not need separate versions for email and LINE, and the two will never say different things.
LINE does not show formatting, only the text. Do not rely on bold or colour to carry meaning; write so the words alone get the message across.
When reminders are sent
On the same screen you can set how many hours before the booking the reminder is sent. You can also turn reminders off altogether.
Checks before you start
Rewrite the confirmation message, save it, and use the preview to check that the placeholders are replaced.
Make a test booking and check that the message that actually arrives uses your edited wording. Also check that a booking made through LINE receives the same wording.
Related articles
Reservation Notifications and Customer Reminders / Reservation Notifications on LINE / Editing the Booking Page
-
Booking Menus and Service DurationsHow to set a duration for each booking menu item so customers are only offered times when that much time is free in a row. Covers buffer time, choosing which staff can take an item, visibility (Public, Link only, Members only) and who counts as a member.
-
Editing the Booking PageHow to edit the welcome message, cancellation policy and notes shown on your customer-facing booking page, where each one appears, and what to write to cut down on questions.
-
Charging No-Show FeesHow to charge a cancellation fee to customers who do not show up. Covers the card-on-file setting, when the charge is made, and why a charge may not go through.
-
Staff Nomination SettingsHow to let customers choose a staff member before they book. Covers adding a nomination fee, what customers see on the booking page, and why staff must be registered first.
-
Setting Up Deposits and PrepaymentHow to take a deposit or full prepayment at the time of booking. Covers the four payment options, the Stripe connection you need first, what customers see, and what to check before you go live.