Registering Staff Information
Registering a staff member lets you use their information for shift management, sales aggregation, permission settings, register-in-charge records, and more. Start by registering their display name and assigned store, then add contact information or HR details as needed.
Start a new registration from the staff list
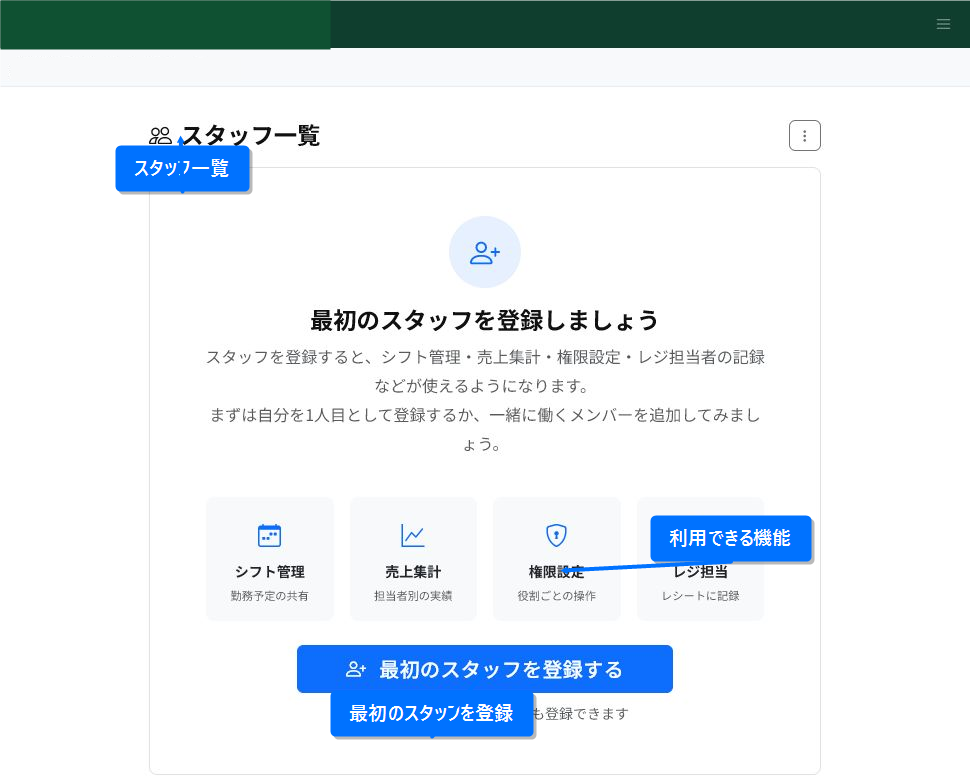
Open "Staff" from the management screen. If there are no staff yet, a prompt to register your first staff member is shown.
Once registered, you'll be able to select the staff member for shift management, sales aggregation, permission settings, and register-in-charge records. Start by registering staff you use on a daily basis, such as yourself, the store manager, or register staff.
Enter basic information and the assigned store
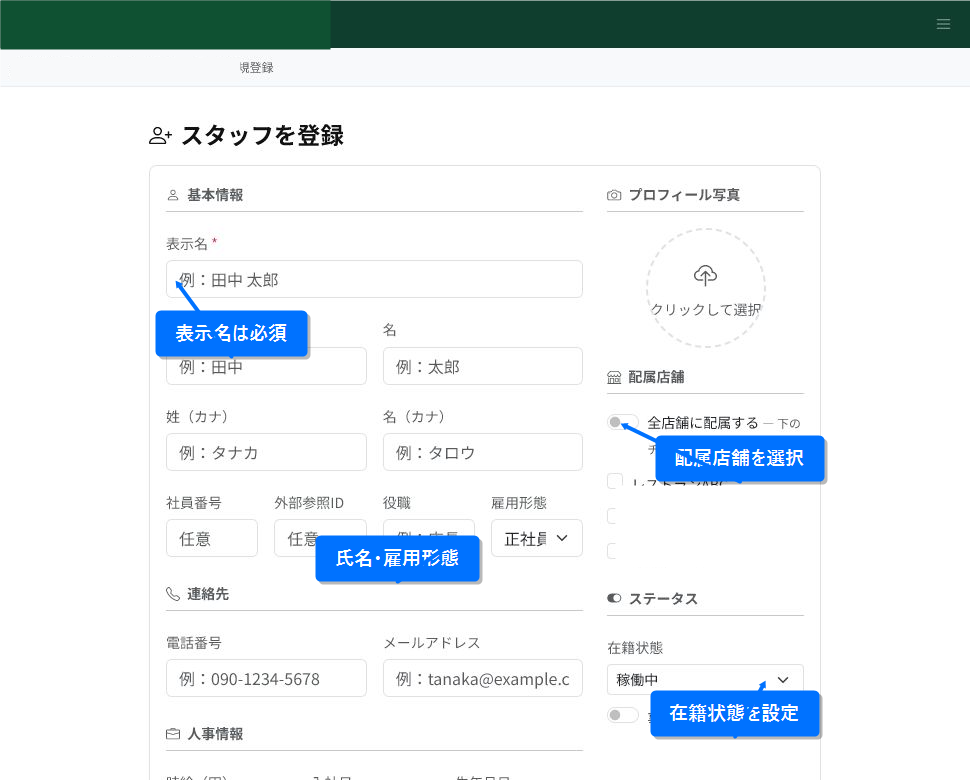
The display name is the name shown in the staff list and other features. Enter first/last name, kana reading, employee number, position, and employment type as needed.
For assigned store, choose either "assign to all stores" or a specific store only. If you operate multiple stores, limiting this to the store where the staff member actually works makes it easier to manage shifts and staff in charge.
Employment status is normally set to "Employed." For staff who are no longer active, such as after leaving or during a leave of absence, you can change this to "Inactive" later.
Enter contact information and HR details as needed
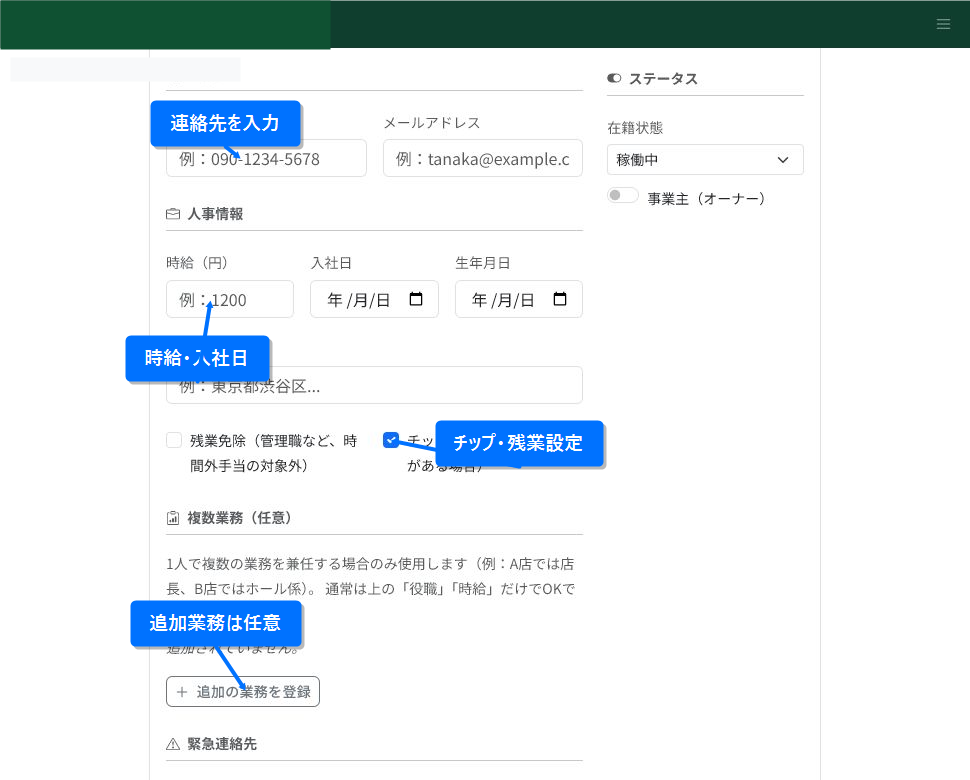
Registering a phone number and email address makes it easier to check contact details later. Enter hourly wage, hire date, date of birth, and address to the extent needed for the store's HR management.
At stores that use tip handling, check "Eligible to receive tips." If a manager or similar role is excluded from overtime pay, also check the overtime exemption setting.
Only if a single staff member holds multiple roles, add the job type and pay conditions from "Register additional role." Usually you don't need to register this.
Enter an emergency contact and notes, then save
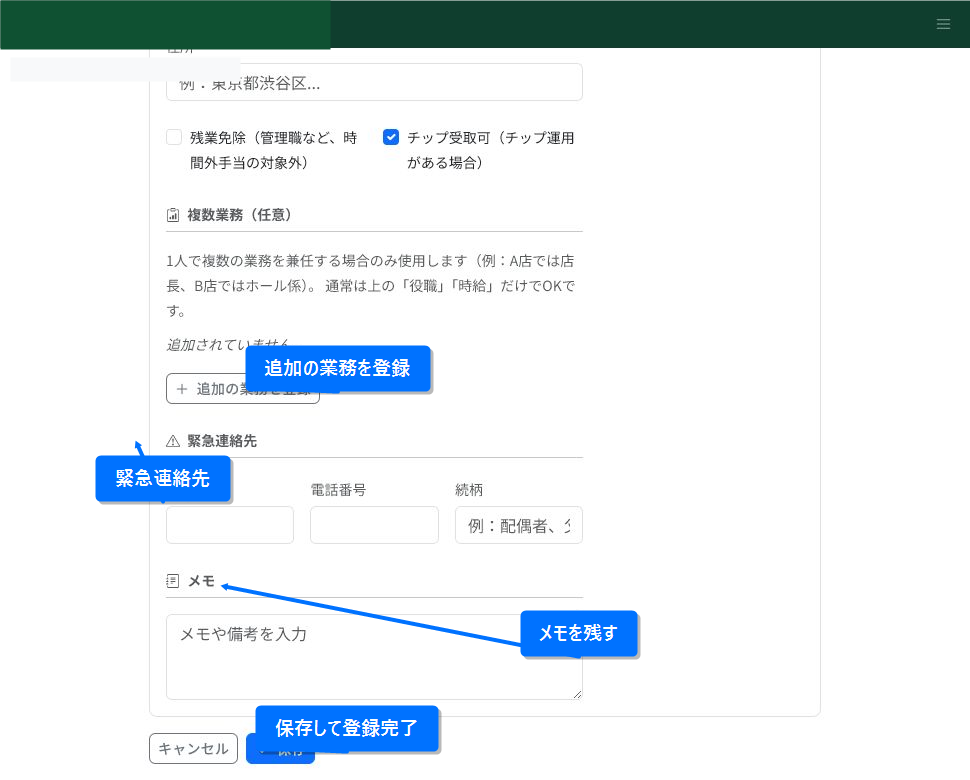
For the emergency contact, enter a name, phone number, and relationship as needed. If there are internal notes or points to be aware of, leave them in the notes field.
Once you've confirmed what you entered, click "Save." If you want to fix the details after registering, open the staff member from the staff list and edit them.
Key points when entering information
- You can register a staff member with just the display name, assigned store, and employment status to start.
- If a staff member covers multiple stores, check "Assign to all stores" or the specific store checkboxes.
- Enter HR information such as hourly wage and hire date only to the extent needed for pay and shift management.
- Additional roles are optional. Usually you'll use position and hourly wage, and only add this when pay differs by job type.
- For staff who have left or are on leave, setting employment status to "Inactive" before deletion makes it easier to check their history later.
Related articles
-
Editing Staff Profiles and PhotosLearn how to update a registered staff member's profile photo, contact info, assigned store, employment status, and HR information, with screenshots.
-
Staff Permissions and Business Account RolesLearn how to assign business account roles (permissions) to staff who log in to Receipt Roller. You can grant permissions suited to each person's role, such as store manager, POS admin, or SNS admin.